How to Prepare for a New EDI Trading Partner in 7 Easy Steps
Posted on December 12, 2016By Charlotte Martinez, Senior EDI Specialist, Lanham Associates
EDI provides huge business value by improving the speed and accuracy with which transactions can be processed in order to comply with Trade Partner requirements. However when you take on a new Trade Partner relationship, it’s very important to understand the Trade Partner’s requirements upfront in order to speed through your business cycle and avoid chargebacks.
Here are 7 Easy Steps to help you prepare for a new EDI Trading Partner:
#1 – Get mapping guides (know what you’re going to map/support), VAN & Trading Partner profile
You’ll need to interact with the Trading Partner to procure the applicable manuals:
- Mapping Guides for each EDI Document traded, such as 850 (Purchase Order), 856 (Advanced Shipment Notification) and 810 (Invoice)
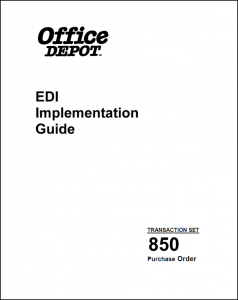 These manuals outline the format in which data will be received on the inbound files and how the Trading Partner wants the data to be formatted on the outbound files.
 - Trade Partner Profile
- This is a document that the Trade Partner will have the Lanham-user fill out with their Trade Partner IDs and other pertinent information. It typically also lists the Trade Partner’s Trade Partner IDs and their preferred method of EDI Connection, such as an AS2 (direct) connection or going thru a VAN (Value Added Network)
- Vendor Compliance Guide
- In general, this manual outlines required shipping procedures such as label placement.
- Label Requirements
- This manual outlines the Trade Partner’s required format of UCC-128 or GS-128 labels as well as any other label requirements they may have
#2 – Make sure proper NAV licensing is used for EDI docs
Be sure the EDI software supports the EDI documents that are to be traded. The typical 850, 856, and 810s are fine, but it’s important to check into this when it comes to those one-off docs, such as an 860 (Purchase Order Change) or 753/754 (Routing Requests). (Note: Lanham supports more EDI documents than any other NAV provider, and maintains a list of EDI supported documents on its Reseller Portal, so you’ll need to work with a Lanham Reselling Partner to tackle this step.)
#3 – Get the EDI version and make sure docs are supported
Technology is evolving exponentially faster these days, and you’ll want to be sure that you’re not trying to map to a new version of EDI from an older software version. Check out this earlier blogpost which explains how to figure out which Lanham EDI version you are running.
#4 – Consider using the Lanham VAN
There are many ways to establish connection with your Trade Partner. The Trade Partner will have dictated their EDI Connection in step #1 (Trade Partner Profile). One of these ways may be using the Lanham VAN if this is the case you’ll need to set up the interconnect between Trade Partner’s ID and Customer Trade Partner ID. (Note: it’s typical for a Trade Partner to have both Test and Live TP IDs.)
#5 – Setup NAV (map EDI docs according to the Trade Partner’s mapping guides)
- When applicable, create UCC-128 or GS-128 label in the Lanham Label Formatter
- Create Packing Rule and populate with the above created label
- Create/Update Trade Partner’s NAV Customer/Ship-to records and populate with the above created Packing Rule
- Create Trade Partner page:
- Map the EDI Documents based on the Trade Partner’s Mapping Guides. The maps may be created by:
- NAV Reseller
- Internally
- Outsource (Lanham Services)
- Setup applicable Cross References:
- EDI Customer Cross Reference
- EDI Item Cross Reference
- EDI Unit of Measure Cross Reference
- EDI General Cross Reference
- Map the EDI Documents based on the Trade Partner’s Mapping Guides. The maps may be created by:
#6 – Test EDI Docs
Think of this as the Dress Rehearsal of EDI. This is when all the above setup is put to use. The Trade Partner will send test EDI transactions to be brought into Lanham EDI and the translation of this data is verified. Once the NAV documents are created and processed, the NAV user will reply via EDI to the Trade Partner with outbound EDI files, as if it were live data. The Trade Partner will review the data and make sure it complies with their specifications outlined in the Mapping Guide. This process may be repeated until the Trade Partner is satisfied.
# 7 – Establish go-live date
Congratulations! Now that all the testing has passed, it is time to schedule the go-live date with the Trade Partner. Once this has been established, you can flip the switch. NOTE: Be sure to update the Trade Partner’s Trade Partner IDs if they use a different ID in TEST vs LIVE.
Go live with new Trading Partner!
Now that you’re live with the Trade Partner, you should start seeing cost savings rather quickly. After all, exchanging EDI transactions takes minutes instead of the time-consuming delays involved in exchanging phone calls, emails and printed paper. You’ll see that using EDI frees up employees to focus on other priorities, shortens lead times, enables real-time visibility into transaction status, and streamlines overall business processes.
To hear more about Lanham EDI best practices, subscribe to this blog or write to us at education@lanhamassoc.com.